Alright, so, we’ve talked about it and the theories behind how it works. Now for some show and tell.
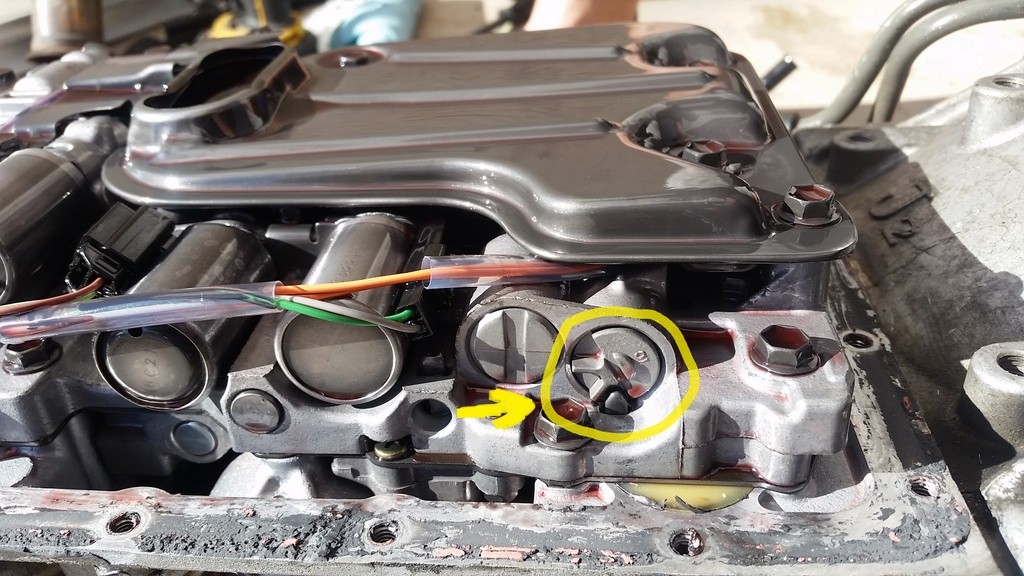
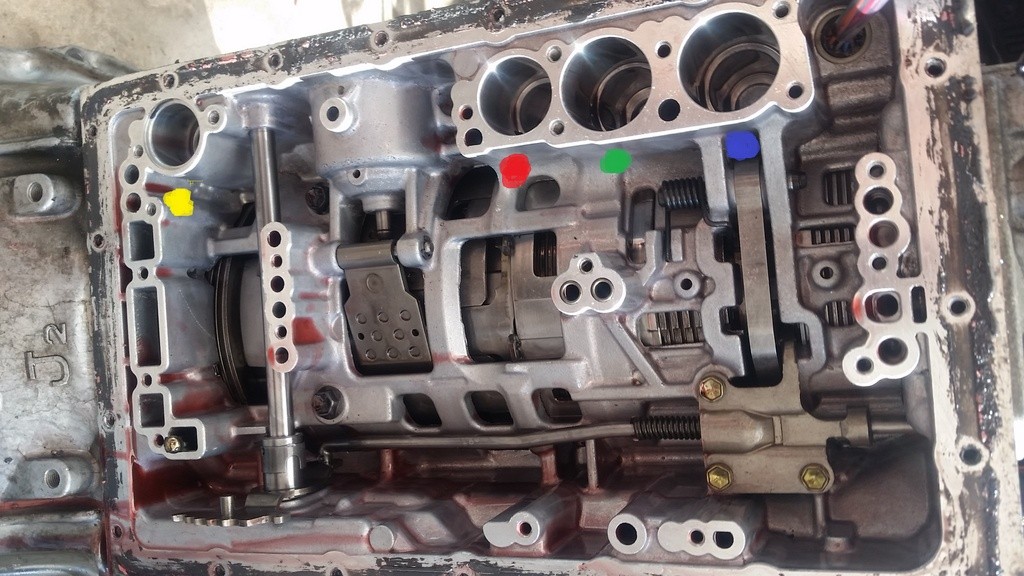
When you first remove the transmission pan, this is the first parts you see. The grey thing in the middle is the screen. Used to call it a filter, but it really doesn’t work that way anymore. Circled in yellow is the pressure setting. In this picture, it is turned up all the way. It is normally in the middle setting. To adjust, simply push in and turn.
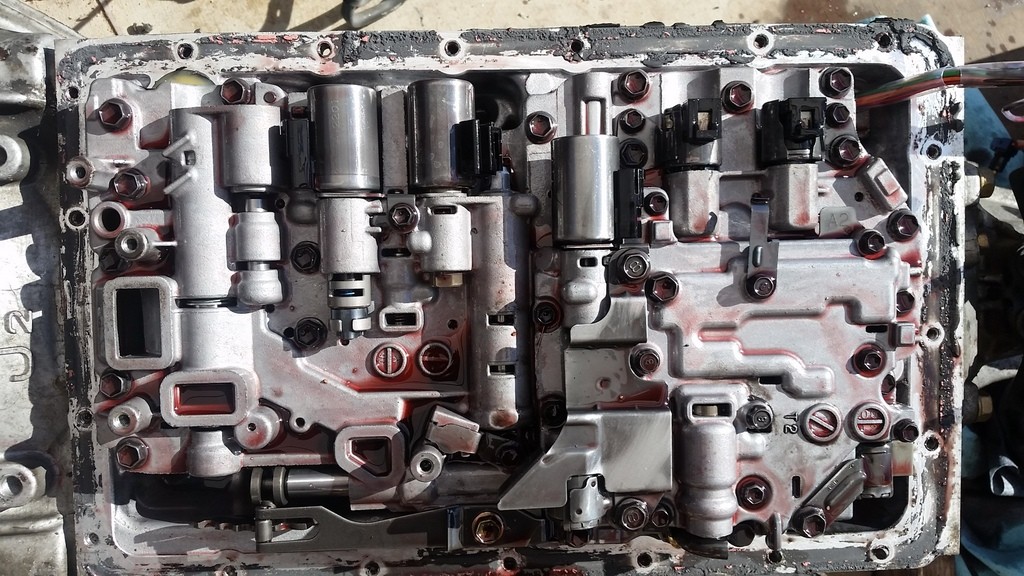
Just a view without the filter or wiring in place.
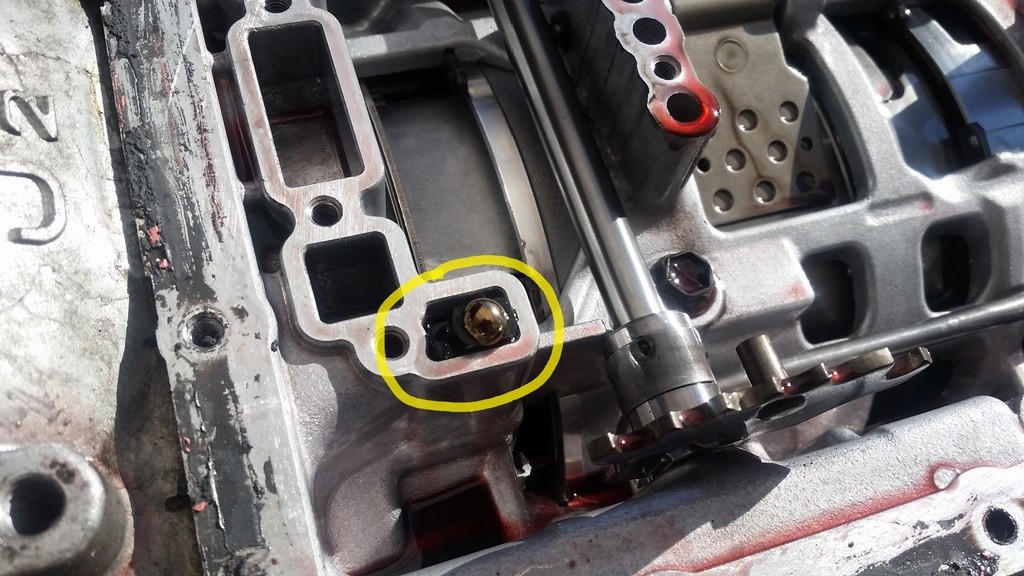
This ball and the plastic piece / spring that comes with it is pretty important. Make sure it goes back in.
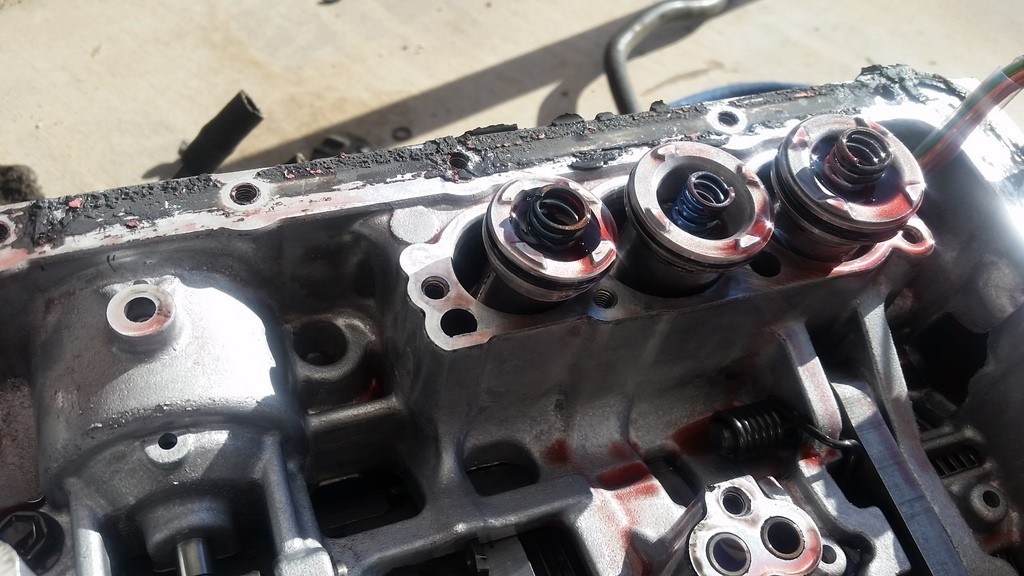
Just a shot of the accumulators.
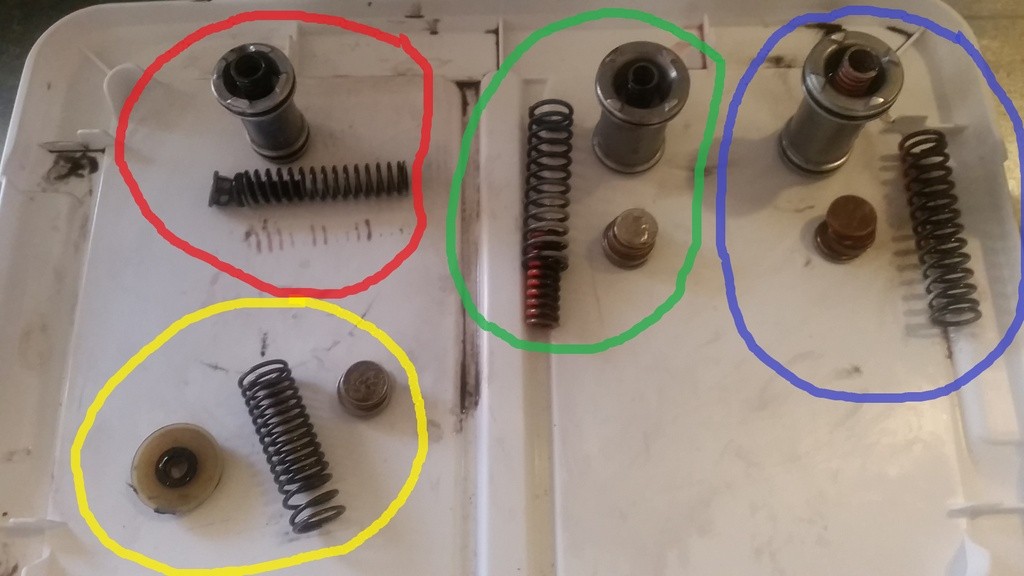
Here is a shot of all of the springs and accumulators and where they go. Also pictured are my home made shims.
For the hard data, here is what you need to know. I personally shimmed mine 12mm – yellow, 12mm – red, 15mm – green and 15mm – blue. These shims were acceptable for daily driving with much firmer than stock shifts but not clunking in to gear. Now that I’ve learned a lot more about these transmissions recently, I might have some ideas to make them more reliable still. Also, it is very important to install the shims inside the aluminum pistons, not in the cylinder itself – doing this would block the fluid holes in the bottom.
So basically, install coolers, turn the pressure control up, shim the springs, and do not replace the rods in the accumulators?
By the way, I stumbled across your site somehow and I am very glad I did. You have amazing information, thank you for sharing.
Great bunch on info here guys, well done! i am going to give this a try in a couple of weeks, looking forward to the results!
Would you please post a picture from a side view of where to put the money/shims inside the aluminum pistons in accordance to the springs? Much appreciated
I’m still trying to guess here.. do the springs sit on top of the coins/shims?
Shims go inside the piston, then spring goes on top of the shims.
I just did this on my is300, the shifts while cruiser are firmer but not to point where it’s uncomfortable you’ll barely feel it shift, but from what I saw is when shifting at full throttle it seems like it could use more shims to shift a bit quicker and the transmission over all just feels tighter. All in all for what it cost in change laying around it’s a great upgrade. One thing to note if your doing this in the car I would recommend having someone there to help put everything back in so one person can hold the accumulators in and the other to start a couple of the bolts to hold the valve body up . That’s for sharing, and I’m looking forward to know how to make this tranny even more reliable